

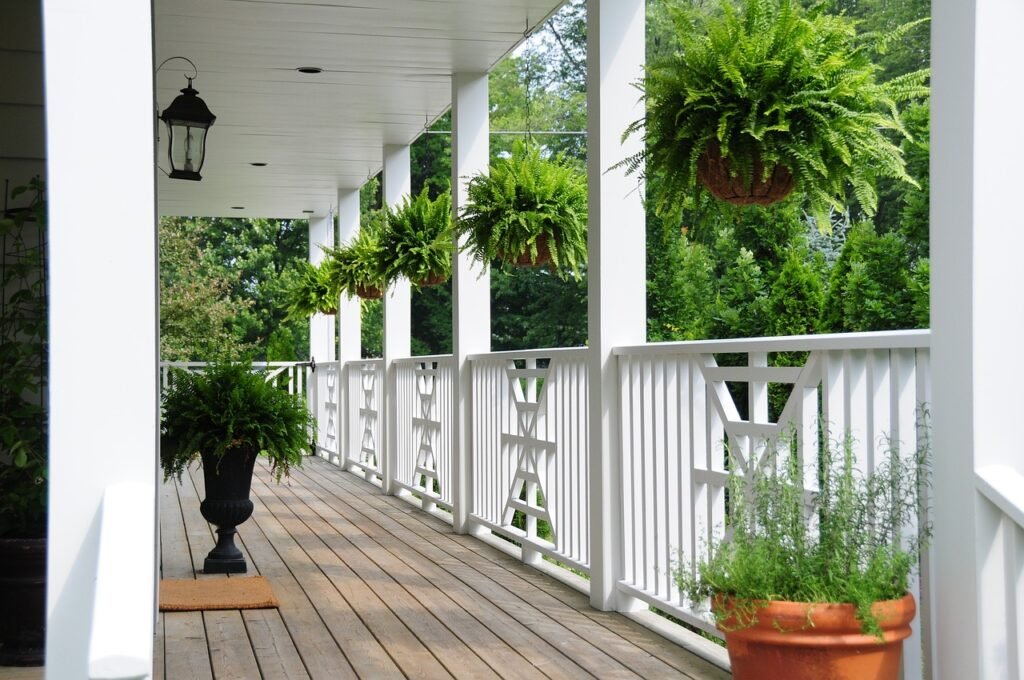
Turn your exterior space into a more relaxing and bug-free hideaway by making a DIY screen porch. Can you imagine enjoying a meal sitting in peace or unwinding without the constant interruptions of flies, mosquitoes, or even the occasional rain shower that pushes you inside the house? If you have been fortunate enough to have a porch that is already covered, adding a screen is quite an uncomplicated task that can be done to enlarge your combined home space and prolong the time you get to enjoy outdoors.
To What Purpose Is the Porch Screened In?
A screened-in porch not only contains bugs but also makes your porch more functional by precluding the elements so that you could use nicer furniture, install a ceiling fan, or maybe go as far as to put a hot tub in it despite the weather. Then adding blinds or curtains would increase your privacy giving you a more conducive and most importantly useful room.
Aside from the practical advantages, it is also a good financial decision to have one built: According to Design Builders Inc., owners could recover up to 75 percent of the cost of such a project, especially while reselling their homes. Just a few months ago, a HomeLight survey of the top 30 percent of real estate agents revealed that over 30 percent said a screened-in porch can go a long way in improving market value because more and more prospective homeowners are beginning to appreciate its worth.
What’s the Cost to Screen in a Porch?
Typical costs will fall between $3 and $5 per lineal foot of the material. You should also allow for any additional expense like the hardware or any tools you do not already have and, if necessary, any building permit expenses that are usually around $300 for the permit.
A DIY project is estimated to cost anywhere from $600 to $3,500. Surprisingly, this will greatly depend on whether your porch is a small or a large one and the kinds of materials or even the other necessary related items like a storm door which might even mean more than a windscreen renovation.
You might save quite a few hundred dollars not just by doing the project yourself on a handy project but also by DIYing it without expenditures on its overheads from labor-conservation material costs-you save by about $2 per square foot. Keep aside, therefore, 10-25% as a surplus.
Porch Screen Step-by-Step: 8 Without-Hassle Steps
If you are ready to take the plunge, consider following these eight basic steps while creating a DIY screened-in porch, presenting opportunities for savoring your dream.
Step 1: Perspire
Prepare and think about what you are going to do before you dive into the project.
Weather and Time: It is said that screening a porch will take you from one to two days, so select a weekend with good weather.
Permits: All building permits are ready and accounted for when the time comes to do any substantial home improvement work.
Measurements: Measure the space you would like to screen fairly accurately, since you’ll have to determine the size of your frames so as to know how many panels you’ll need.
Door and Floor Issues: Do not forget to consider the door and floor since some conditions could call for the building or reconstruction of stairs and door insertion modifications.
Step 2: Choose the Materials for the Job Appropriately
Material choices will depend on what you can afford and do with a novice touch. If you are a beginner, a screened-in porch kit would make a good option because it is easier to install and takes less labor. ScreenEze is popular as it does away with rubber spline used to hold the screen in place, making installation simpler.
Quality of the Material:
Fiberglass: Clingy and stiff, but breaks easily.
Aluminum: Much rougher than fiberglass, but can be prone to rust.
Pet-Resistant: Calls a thicker, tougher veil into action, great for homes with pets.
Solar Screens: For wagers, seem to the heavens and draw a beam of light cascading in.
Take Step 3: Gather Your Tools
Whether you’re using a kit or building custom frames, you’ll need a few basic tools like a tape measure, saw, drill, level, and a utility knife. If you’re using a kit, many components may be pre-cut and ready to install.
Step 4: Check the Level of your porch once.
Ensure that your porch frame is level and plumb for a smooth finish that is up to professional standards. Use a level for checking the horizontal lines, and a plumb bob or level for the vertical lines. Whenever slanting is present, framing or trim may be added to correct this.
Step 5: Place the Mounting Base.
Cut and attach the mounting base onto which you will install your screen. Typically, you would use aluminum or vinyl components for this step. Drill pilot holes before dropping the base and then moving and securing it.
Step VI: Screen Placement
With this stage, install the screen. In channel-screen kits, making, cutting, and holding screening into the track is required. It’s such that the fabric is stretched as you go along, including the cutting using a utility knife, when you find excess.
Step VII: Installation of Cap Strips
On the edges of their home screen, cap strips conceal the otherwise visible. They can be tapped firmly into place using a rubber mallet against those creatures daring to display them, if necessary, a trimming of their trim.
This completes the list of eight projects: Storm Door Installation
Finish the porch by adding a storm door that matches the trim on the house. During installation of such regulating furnaces, the doors to the storm might be used such that they hold as well glass panels as screen inserts, making it easy to use year-round.
When to Hire Help
For most DIYers, screening a porch is simple, but other tasks are more suited to be handled by a professional. For example, if there is a need to frame a porch, touch a door or steps, or introduce electricity into a ceiling fan or motorized screen, then a contractor is the solution. A professional’s work has the double advantage; firstly, it is executed in conformity with code and, secondly, you save time and are relieved of both effort and worry.
That is how one can transform a nice resting and insect-less porch into a superior structure for habitation and for adding value to their home.


Leave a Reply